
Showing posts with label Tips and Tricks. Show all posts
Showing posts with label Tips and Tricks. Show all posts
28 March, 2011
Everytime we are checking spelling of our documents with the software installed in computer,but if you want to check spelling online then there are few best websites listed below. No need of registration
1. JSpell.com
The free tool on JSpell.com checks spelling in multiple languages, including English, French, German and Italian. JSpell also includes a medical spell checker. To check your spelling on JSpell.com, you type or copy and paste your text into the field, then click the “Spell Check” button.
The spell checker goes through the list of dictionary words, then lets you replace or ignore any word that’s not found. It also has a “Learn” function that lets you add unknown words to the dictionary.

2. Orangoo.com
The free spell checker on Orangoo.com checks spelling in English, Spanish, French, German, Italian, Portuguese and many other languages. You can either type or copy and paste your text into the provided field, then click “Spell Check Your Text Now.” The unrecognized words will be highlighted and changed to links.
You can then click the links and select the correct spelling of a word from the drop-down menu. Orangoo.com also provides a tool to spell check your website. After you copy and paste the URL of the website and an email address, the spell check report will be emailed to you.

3. Respelt
Respelt.com has a free online spell check tool that lets you check the spelling of text in English only. You can type or paste text into the field, then click “Check Spelling.” You can also enter the URL of a website or an RSS feed.
Misspellings are noted at the top of a field on the right side of the page, as well as in red underlined text within the field. You can click each underlined word to see a list of possible spelling corrections. You can also add unrecognized words to the dictionary. When your text has been corrected, click the “Copy to clipboard” button to copy and paste it into another program.

4.W3C Spell Checker
The W3C Spell Checker allows you to check the spelling of web pages in English or French. There is an option to present possible spelling corrections for unrecognized words.
After you run the spell check, you can select a suggested term from the list beneath each unrecognized term. If you’re a member of the W3C Comm Team, you can also check a box to add each term to the W3C Spell Checker dictionary.


How to test the internet connection speed or the network
Posted by Unknown | | Category:
Tips and Tricks
|
0
comments
It can be helpful to analyze network or connection problems for instance, or a tool for webmasters to find out how fast they can connect to their websites which is a form of testing the website’s speed especially when the data is compared to related websites.
Most speed tests on the Internet let you connect to one of their servers to perform the test. That’s sometimes not beneficial especially if the servers are not located in your country.
Tracert and ping are available on the local system but they do not reveal the speed of the connection.
SpeedTest is a free client and server software for Windows that can be used to test the connection speed of a local network or the Internet.
Users can install the client version to test the connection speed to IPs or Internet domains, or the Server version to allow clients to connect to that server to test the connection speed.

To test the speed users enter either an IP address or domain name in the Server form in the application interface. A click on connect or the enter key will connect to the location and record information about the connection. This includes the time, duration, bytes received and speed in KB/s.
The speed tester creates a visual representation of the connection speeds in a chart automatically.

Results can be printed or copied from the connection log. SpeedTest is available for download at the developer website. It is compatible with 32-bit and 64-bit editions of the Microsoft Windows operating system.
Open Here
Most speed tests on the Internet let you connect to one of their servers to perform the test. That’s sometimes not beneficial especially if the servers are not located in your country.
Tracert and ping are available on the local system but they do not reveal the speed of the connection.
SpeedTest is a free client and server software for Windows that can be used to test the connection speed of a local network or the Internet.
Users can install the client version to test the connection speed to IPs or Internet domains, or the Server version to allow clients to connect to that server to test the connection speed.
To test the speed users enter either an IP address or domain name in the Server form in the application interface. A click on connect or the enter key will connect to the location and record information about the connection. This includes the time, duration, bytes received and speed in KB/s.
The speed tester creates a visual representation of the connection speeds in a chart automatically.
Results can be printed or copied from the connection log. SpeedTest is available for download at the developer website. It is compatible with 32-bit and 64-bit editions of the Microsoft Windows operating system.
Open Here
MagicScroll is a web service that lets you read any EPUB file online. You can read eBooks right within your browser. It’s a free service that you can use without any registration. Simply upload a file and start reading. It also allows you to share EPUB books with your friends. To do this, upload a book and you’ll be given a permanent URL for the book, that you can share with your friends.

MagicScroll has a simple interface where you will find a simple box that lets you upload EPUB files. After uploading a book , you’ll receive a permanent URL for your book. Save this URL, so that you can read your book on various devices. Once you’ve uploaded a book, MagicScroll will process the book for quick reading.

You can use the arrow keys to turn the page. You can also use the table of contents to go to a particular chapter.

If you don’t want to use the arrow keys, then you can take the help of built-in magic scrolling function. To active this function, click the “Play” button in the bottom-right corner. This will replace the text with text from the next page. You can disable this feature right from the settings menu.

Click Here to get started.
The name of this app is Terminal. Now we are going to show you step by step instructions using which you can create audio files using the Text to Speech feature of Mac OS X. Now follow the steps carefully.
INSTRUCTIONS
STEP 1. From the Applications:Utilities folder, you have to launch the Terminal app.
STEP 2. At the command prompt you have to type cd ~/Desktop and then simply press Enter.

STEP 3. Now simply type “read this” then press Enter so that your Mac read a string aloud. Also you can replace the text in quotes as you wish.

STEP 4. Now type v Alex “read this” and then press Enter so that your Mac can read in a different voice. You can replace Alex with any of these Mac voices i.e Vicki, Alex, Kathy, Victoria, Fred, Bruce.

STEP 5. Now type v Alex -f “textfile.rtf” and then press Enter so that your Mac can read from a text file. You can replace textfile.rtf with the filename of a plain text file that you have placed on your desktop.

STEP 6. Now type v Alex -o “audiofile.aiff” “read this” and then press Enter, it allows your Mac to read straight into an audio file type. You can replace “audiofile.aiff” with the audio filename you would like created.

How to setup Facebook Chat within iChat in MacOsX
Posted by Unknown | | Category:
Tips and Tricks
|
0
comments
Follow the steps carefully to chat your facebook friends in ichat.

INSTRUCTIONS
STEP 1. From your Applications folder you have to launch iChat.
STEP 2. From the iChat menu, click on Preferences.

STEP 3. Now you have to add a new account. For this simply select Accounts tab then click “+” button which is at the bottom left of the window.

STEP 4. Now simply Type dropdown from the Account and then click on Jabber.

STEP 5. Now you have to enter your username and password.

STEP 6. Now expand the Server Options, then set the Server to chat.facebook.com and the Port to 5222.

STEP 7. Now simply click on Done button. Now a new account will be appeared in the list on the left side of the window.

STEP 8. Now simply sign in and you can use iChat to send message to your Facebook friends.

Source: SolidBlogger
How to change blogspot domain to Co.CC domain
Posted by Unknown | | Category:
Tips and Tricks
|
0
comments
As Kang Rohman suggest you to change your blogspot with Co.CC for your new blogspot blog, not for your old blog, why so? Because if you do the change to your old blogspot, whether with domain of Co.CC, .com, .net or anything else, your blog will be consider as the new blog.
I mean, what you have built to your old blog will be in vain and useless, for instance, the backlinks, your registration to several websites for the improvement of your blog, and more. You should start it again from the beginning or do the change to your registration setting. Therefore, Kang Rohman suggests you to change the blogspot domain only to your new blog. However, if you think you should do that due to any reason and consideration, just go on.
Well, let’s get our point, below is how to set up or change blogspot domain with Co.CC:
- Click here if you have not yet had your Co.CC domain. Please register first if you haven’t has your own account.
- After you have your account, please sign in to www.co.cc with your account.
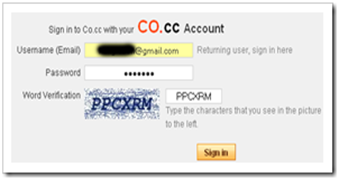
- Click the Getting A New Domain tab (with assumption that you haven’t had your domain name).

- Type the domain name you want, click the Check availability button to check the availability of yourdomain name, repeat if unavailable.
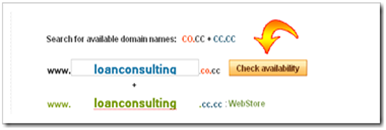
- If the domain name is available, click Continue to registration button as the screenshot below


- Congratulations, you now have your own domain name of Co.CC. To be noted, you haven’t managed the setting to your new domain.
In order to do setting to your new domain of Co.CC you can follow these steps below:
- As usual, you sign in first with your account, then click Domain Settings as you see at the screenshot below

- Click Set up at your new domain name as seen at the screenshot below, then it will appear the wordsPlease domain setup now as the notification that your new domain name of Co.CC has not been set up.
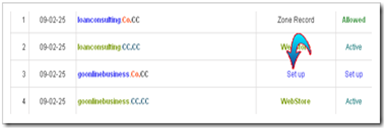
- Click the words Please domain setup now to set up your new domain name of Co.CC. On this page, you will choose one of the three domain setup as Manage DNS, Zone Record, and URL Forwarding. For those who want to change the blogspot domain name with Co.CC, you should choose the ZoneRecord by click it or its radio button.
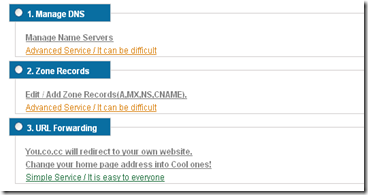
- After you choose Zone Record, there will appear the setting option as the screenshot below
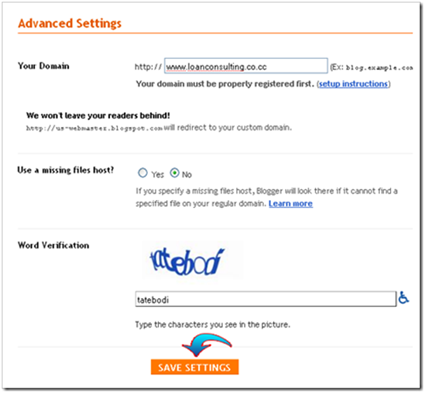
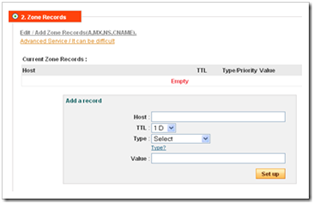 At the dialogue box, fill the Host with your domain name of Co.CC, e.g. www.loanconsulting.Co.CC(the Host name of my Co.CC domain). Then at TTL let it as 1D, for Type, choose CNAME, and Valuefill with ghs.google.com. After all fields are filled out, click the Set up button. You can see the exampleof my setting as the screenshot below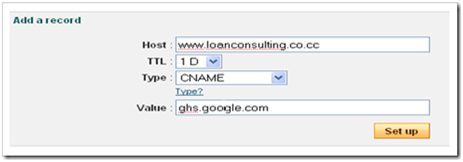
- Now you finish setting your new Co.CC domain, but usually you have to wait for about 48 hours until your new domain is active.

Well, now it’s time to change the blogspot domain with Co.CC domain. Please follow the steps below:
- Log in to blogger with your account.
- Click Settings at the dashboard
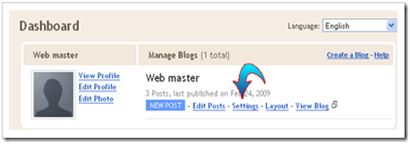
- At the Settings page, click Publishing
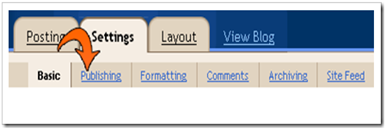
- When you are at the Publishing page, click Custom Domain
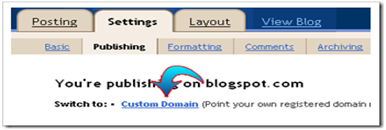
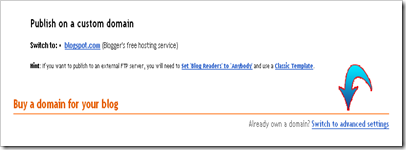
- At the page of Publishing on custom domain, you are not asked to buy the domain (except you want it), but we will use the blogspot domain that we have made, then click Switch to advanced settings to change your blogspot domain with Co.CC domain.
- At the page of Advanced Settings fill with your Co.CC domain at the field of Your Domain e.g.www.loanconsulting.Co.CC (it’s my Co.CC domain). The for Use a missing files host? Leave it asNo and at the field of Word Verification fill with the words that appear with blur (colored and unclear). After all fields are filled out, click Save Settings.
- Be sure that Save Setting at Point 6 is successful with the sign as the words Settings Were Saved Successfully at upper right of the page
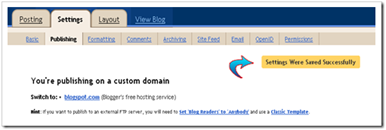
- You have finished changing your blogspot domain with Co.CC domain.


Note: usually you have to wait for about 48 hours until your new domain is active as Co.CC regulation.
If you are interested in changing your blogspot domain with Co.CC domain, happy trying and good luck.
26 January, 2011
Turn-Off Laptop or Desktop Monitor Instantly
Posted by Unknown | 26 January, 2011 | Category:
Application Software,
Tips and Tricks,
Window 7 Tips and Tricks
|
0
comments


Most laptops don’t have a hotkey or button to turn-off their monitors. The only thing you can do is either decrease the brightness of the screen or close the monitor itself. The former still consumes precious laptop battery, while the latter is not practical because it traps heat and the sounds coming out of the speakers.
You can also tweak the PC’s Power Options in the Control Panel but the turning-off of the monitor will not take effect immediately — you still have to wait one minute (at the least) and that your machine should be inactive.
The WinFlog software can instantly turn-off your laptop or desktop monitor. The main program that runs this tool is incredibly undersized at only 20kb, yet it functions as expected. Also, it does not need to be installed.
WinFlog is a compilation of small but very useful applications. Aside from turning off laptop and desktop monitors, with proper registry setting, you can also use this software to turn-off and on Vista’s Aero, eject a CD, and switch windows in 3D.
You can download WinFlog at http://unlockforus.blogspot.com/2008/01/winflog-turns-off-your-monitor.html.

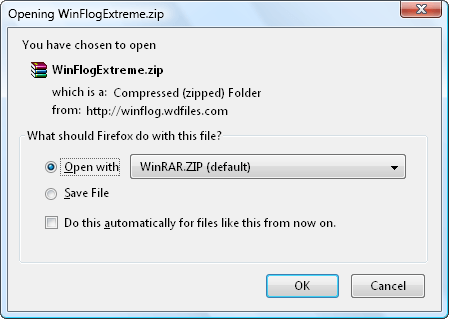
Select whether you want to open or save the zip file, and then click OK.
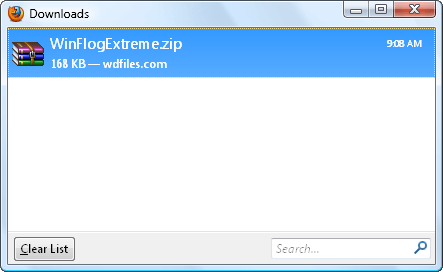
Wait for the download to finish.
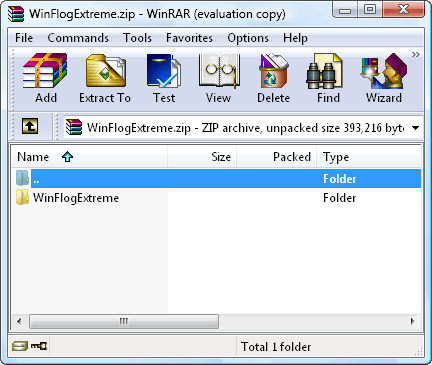
If you’ve opted to open the zip file, an archiver program will immediately open the file for you after the download is complete.
Extract or de-compress the zip file to your preferred computer directory.
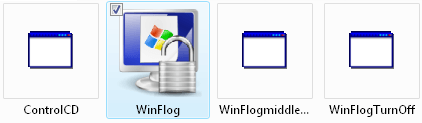
After extracting, open the WinFlog executable file (as shown below).
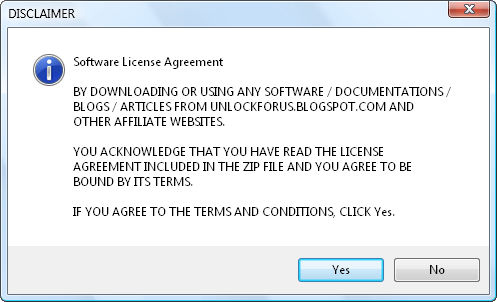
Click the Yes button to proceed to the next page.
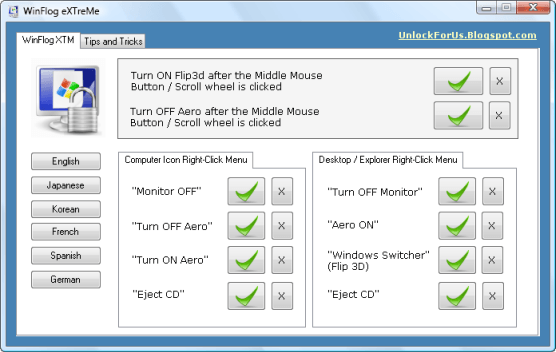
This is the program’s primary interface. You can select your ideal language by clicking one of the language buttons.
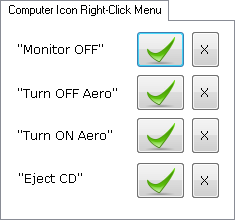
To use WinFlog’s tools, just press the buttons with the green check mark. As an example, we will click here the Monitor OFF check button.
This function, however, only works with Window XP. I will show you latter on how to turn off your monitor if you’re using Vista as your operating system.
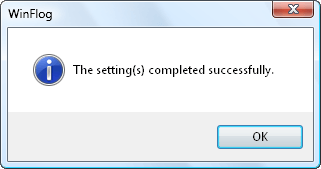
After pressing a button, the command is now set (for this instance, the turning-off command is now enabled).
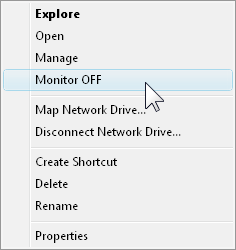
To turn-off a monitor, just right-click the My Computer icon and
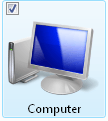
press Monitor OFF. This will instantly turn-off your laptop or desktop monitor. Aside from the My Computer icon, you can also apply the Monitor OFF command to your Desktop and Windows Explorer.
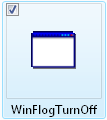
In Windows Vista, to turn-off a monitor, go to the location of the unzipped file and then double-click WinFlogTurnOff.exe (as shown below).
You can create a desktop, taskbar, and / or system tray shortcuts of this tool so that the turning-off of the monitor is just a click away.
Thanks and Regards !
Subscribe to:
Posts (Atom)