30 July, 2010

General Steps for Securing your Wireless Router

Posted by Unknown | 30 July, 2010 | Category: | 0 comments

Here are some general steps for securing your wireless router. The one you're particularly asking about is Step 4, but they are all good ideas.

  1. Disable wireless access to your router's admin pages. Leave admin access for wired machines only. You don't have to keep one machine ON a wire, just leave a wire hanging from the router and connect to it when you need access to the admin pages. Note: This has no effect on wireless Web access, just router admin.
  2. Turn off the SSID beacon (broadcasting). You're not running a WiFi hotspot; all your computers should know the network name.
  3. Change the SSID (network name) from the factory default so hackers can’t guess it.
  4. Turn on encryption: WEP (for 802.11B/G networks) or WPA (for pure 802.11G networks).
  5. Change the router administrator password.
  6. Reduce the number of DHCP (automatic IP addressing) addresses in the router to the number of computers you have and no more.
  7. Restrict access to the router to only the MAC (Network Interface Card hardware addresses) you want.
 Hope that helps.

27 July, 2010

Select a Domain Name That Boosts SEO

Posted by Unknown | 27 July, 2010 | Category: , | 0 comments

There are two ways of selecting a domain name. You can choose the domain name first and use it as your organization name or vice versa. Most of the old organizations prefer to retain their brand name in their URL.
Many startup organizations select their URL first and then name their organization. This is because of the non availability of the perfect URL.

Your website URL is your online identity that is visible to millions of internet users. It impacts your organization name, website seo and future business endeavors. All these factors should be taken into consideration before selecting a URL.

Boost Your Website SEO with the Following Domain Selection Tips:

1. Choose a Keyword Rich Domain Name:
A keyword rich URL is a bonus for any website. It helps boost ranking in the search engine results pages. If the desired keyword rich URL is not available, you can add a prefix or a suffix to the keyword. A URL which contains a combination of keywords helps in drawing more traffic to the website.

2. Include Hyphens in the Domain Name:
Search engines can distinguish between hyphenated keywords very easily. This helps in ranking better in search results pages. Hyphenated keywords in the URL are a good option if the desired keyword rich URL is not available.
There is one pitfall in using hyphens in the URL. Your website visitor can land on the competitor's website if they forget to add the hyphens. Webmasters should include hyphens as a last option to obtain the perfect domain name.

3. Select A Top Level Domain Name:
A website URL should be selected based on the geographical location of the customers. If your website caters to the customers at a global level, a dot-com domain is suitable for you. If the dot-com domain is not available, you can opt between dot-net and dot-org. If your organization is based in United Kingdom, your top level domain should be dot-co-dot-uk. A non-profit organization should opt for dot-org as their top level domain.

4. Purchase a New Domain Name:
A domain name should be researched well before purchasing. It is an important to get a URL related to your niche.

Tips for purchasing a new URL:

a. The name should be easy to spell & remember.

b. URL's are inexpensive. You can register multiple keywords rich URL and redirect them to the main domain. As a result, a lot of traffic will be directed to the main site.

c. Make sure that you are not infringing another organizations brand name.

d. If your organization belongs to a particular region, Purchase a geo specific URL. This helps in capturing the target audience.

5. Purchase an Aged Domain Name:

Always check the background of an aged domain before purchasing it. Aged domains can give your website seo a good boost.

Tips for purchasing an aged URL:

a. Check the domain age. This will give you an idea of how old the domain is. Google gives a lot of importance to aged domains in search results pages. Your chances of ranking well improve with the age of the domain name.

b. Note the page rank of the aged domain. As the page rank increases, the importance of the domain increases.

c. Calculate the number of backlinks of the aged domain. An aged domain should have a few hundred backlinks. If the backlinks are not sufficient or are of poor quality, move on to purchasing another aged domain.

A good domain name should not exceed 67 characters. Look for a reputed service provider to host your URL. Register your URL for a few years instead of one year. Your website will leave a good and lasting impression on Google.

Fixing the Double Click problem

Posted by Unknown | | Category: | 0 comments

When the virus have attack to your computer and the open command is not working while double clicking the mouse to the drive. Then you can solve this problem by just editing a simply registry command. Here are the process:
Run Registry Editor
Go to
Start >> Run >> (type) regedit >> (rightclick on the title my computer icon, and export the whole thing.)
Then find "MOUNTPOINTS2" using Ctrl + F
Delete the same
Repeat the process unless all the "MOUNTPOINTS2" are deleted

Now your system will be OK.

Show Hidden Files Editing Registry

Posted by Unknown | | Category: | 0 comments

Start >> Run >> (type) regedit >> (rightclick on the little my computer icon, and export the whole thing.)

find this key: HKEY_CURRENT_USER\Software\Microsoft\Windows\CurrentVersion\Explorer\Advanced.
Go to the rightside of the window, where the values are. Find the value "Hidden" .
Rightclick it and modify it to 1.

User Key: [HKEY_CURRENT_USER\Software\Microsoft\Windows\CurrentVersion\Explorer\Advanced]
Value Name: Hidden
Data Type: REG_DWORD (DWORD Value)
Value Data: (1 = show hidden, 2 = do not show)

Increase Network Connectivity

Posted by Unknown | | Category: | 0 comments

1.Run Registry Editor (regedit). 

2.Navigate to the following registry key: 
  
  HKEY_CURRENT_USER\Software\Microsoft\Windows\CurrentVersion\Internet Settings

3.Create the following two new DWORD (32-bit) Value and named them accordingly: 

  MaxConnectionsPerServer
  
  MaxConnectionsPer1_0Server

4.Set the value data for the registry entries created to an integer that equal to the number of simultaneous  connection requests to a single HTTP server allowed. For example, if you want the maximum number of concurrent downloads or web page loading to a single server is 8, just enter the value as 8 (Decimal or Hexadecimal). For 10 connections, enter 10 as Decimal or 000000a as Hexadecimal. By default the values are 2 and 4 respectively. 

5.Reboot system or log off and login again for the change to take effect. 

EU loses in WTO information technology

Posted by Unknown | | Category: | 0 comments

GENEVA (Reuters) – A World Trade Organisation panel has ruled that the European Union was wrong to impose duties on three types of electronics products from the United States and other countries, trade sources said on Monday.
The WTO panel backed the United States as well as Japan and Taiwan in their complaint that EU duties on flat-panel displays, multifunction printers and television set-top boxes violated the WTO’s Information Technology Agreement (ITA).
That 1996 agreement eliminated duties among a group of 72 participating countries on goods like computer screens and printers to promote trade in high-tech products.
But the European Union argued that added functionality meant some of these products were now also consumer goods not covered by the agreement rather than information technology products and therefore should not benefit from the lower duties.
As a result, it imposed duties ranging from 6 to 14 percent on the three products. EU imports of the three products from all suppliers totaled about $11 billion in 2007.
“Most of our arguments were accepted by the panel,” said an official from one of the complaining countries.
The WTO panel issued the panel report on a confidential basis to the parties in the dispute on Friday. On Saturday, officials in Taiwan said the ruling would save exporters of flat-screen tariffs up to $611 million a year.
Major flat screen makers in Asia include South Korea’s Samsung Electronics and LG Display and Taiwan’s AU Optronics.
The report will be published around the end of August when it has been translated into other WTO official languages, after which the EU has 60 days in which to appeal.
There was no official comment from the four parties to the dispute.
(Reporting by Jonathan Lynn)

How to Uninstall and Remove Windows 7 or Vista Leaving Windows XP on Dual Boot System

Posted by Unknown | | Category: , | 0 comments

Windows operating system supports dual-booting a PC, where users can install multiple OSes and select which system to boot up to on machine startup. If you have installed Windows 7 or Windows Vista on top of current existing Windows XP to make the PC a dual boot system, but now decided to ditch or dump the Windows 7 or Windows Vista partition to revert to the old good classic Windows XP follow the guide below to uninstall and remove Windows 7 or Windows Vista to leave only Windows XP without having to reinstall the OS, and without affecting saved files and data.

Important: Do not use this tutorial if your dualboot system is Windows 7 and Windows Vista.

1. Boot up and log on to Windows XP desktop. 
2. Insert the Windows Vista or Windows 7 DVD installation disc into CD-ROM or DVD-ROM optical           drive. Alternatively, mount the Windows 7 or Windows Vista DVD ISO image on any virtual drive. 
3 .Run Command Prompt, or click directly to Start menu -> Run command. 
4. In the command prompt or the Run text box, issue the following command and hit Enter: 
    [DVD Drive Letter]:\boot\bootsect.exe /nt52 ALL /force
    For example,
    If the DVD drive path is D:, then enter the following:

    D:\boot\bootsect.exe /nt52 ALL /force 

    The step will remove the boot menu to select operating system to start. 

5. Remove the DVD disc and restart the computer. 
6. The computer will boot up with Windows XP installation partition. 
7. Manually remove files and folders of Windows Vista or Windows 7, including Windows, Program Files and Users folder. If you’re installing to separate partition, just format the partition to clean it instantly (with FDisk, Disk Manager of Computer Management or third party partition management software such as Partition Magic or EASEUS Partition Manager). 
8. On the root system folder of Windows XP, delete Boot.BAK and BootSect.BAK. The two files are remnant backup leftover files of previously installed Windows Vista or Windows 7 bootloader, but no longer useful for Windows XP only system. Tip: NT52 is the MBR (Master Boot Record) used by Windows XP and Windows Server 2003, while Windows Vista uses NT6. So if you’re uninstall Windows 7 in Vista/7 
dual boot system, change the NT52 in the command to NT60.

Fast Shortcut: It’s also possible to format the Windows Vista or Windows 7 partition straight away, and then start the computer with Windows XP Setup CD to repair the system partition, or run the “bootsect /nt52 c:” command above from the \boot\ folder of leftover OS immediately to repair the boot partition.

Tip: When startup repair the boot record after removing an installed operating system from dual-boot or multi-boot system, always use the highest version of Windows installation DVD/CD to perform the repair. For example, in a tri-boot PC with Windows XP, Vista and 7, after uninstalling Windows 7, use Windows Vista to repair the system. If the PC is restored and reverted back to Windows XP, then use the Windows XP setup CD.
1                                                          

Top 5 Ways to Prevent Copyright

Posted by Unknown | | Category: | 0 comments

If you are launching a new site, especially a new blog, there are several things that you can do to make sure that your copyright is as protected as possible.
Simply put, when you are starting from scratch, you have a rare opportunity to get things right from the start and many of the best tools to protect your work function at their best when you use them from day one.
So, if you’re preparing to launch a new site, whether it is a static one or a blog, here are the steps you need to take today to protect your work or, if you’re not interested in enforcement, track it and encourage its sharing.

1. Register with the U.S.Copyright Office

Registration with the U.S. Copyright Office is both slow and expensive. It’s also hopelessly out of date with the current Web and can take some nine months get your certificate.
Still, the fact remains that, if you want execute your full rights in the U.S., you need that registration. You need it both to file suit in a Federal Court and you need to have either registered before the infringement or within three months of publication to be able to collect statutory damages.
If you think you might ever want to sue for copyright infringement, you will want to register your work promptly. It’s a pain and it costs $35 but it can be invaluable down the road.
Likewise, as you add content to your site, you will likely want to re-register every 3 months to ensure that the registration is up to date and all content is protected.

2. Register with FairShare or Use Google Alerts

If you have a site where most of the content will be in an RSS feed, set up an account with FairShare so it can begin tracking the content in your feed from the first post. The service is free and only requires you to subscribe to the provided RSS feed where it will list where matches of your work were discovered along with some basic information.
If your content is largely static, you can use Google Alerts. I’ve covered Google Alerts before, but basically you just find good, unique phrases within your content and have Google search for those phrases and email you with any results it finds.

3. Set up an RSS Footer

If your site will put a large part of its content into an RSS feed, add a footer to the feed. You can use a simple WordPress plugin to do that if you’re a self-hosted WordPress user or, Blogger users can simply use the option in their admin panel.
Ideally, it should include a copyright statement, a link back to your site and, possibly, a digital fingerprint to make the tracking of your content even easier.
Since RSS scraping is one of the biggest problems content creators face, this can make sure that such use is at least attributed and trackable, even if it won’t put a stop to it.

4. Set Up Your Site’s Footer

Though you don’t technically need to include any copyright information for your work to be protected, it is a very good idea to do so as many have the misconception that, if it is not marked, it is free to use.
Make sure your footer includes all the basic copyright information including the year, which you can configure to update automatically, the copyright symbol, your name and the license information for the work (All Rights Reserved, Creative Commons, etc.)

5. Add Contact Information for Permissions

Finally, as you’re setting up how people will contact you, make sure to have a means for people to contact you to ask permission to use your work.
This is a good idea even if you use some form of blanket licensing, such as Creative Commons, as people will still contact you about these issues. This happens both because they don’t understand or see the license and because they want to use the work in a way that goes beyond it.
If you offer a clear path to contact you about these issues, even if it is just through your regular contact page, you’ll find people to be much more likely to ask permission than they would otherwise.

Bottom Line

When starting a new site, whether your first or your hundredth, it is a chance to get things right and avoid mistakes that you made with the other efforts. Copyright is no different in that regard.
If you value your content, its worth taking some time before launching to make some adjustments and make sure that your work is protected. Doing so will not only help you enforce your copyright, but also track where it appears on the Web, legitimately and unlawfully, letting you better understand your audience and reach.
So take the opportunity and spend a few minutes making sure your work is adequately protected.

India Plans $35 Android Tablet Targeted For Educational Purpose

Posted by Unknown | | Category: , | 0 comments

As you may have heard the cheapest vehicle from India, now seems that the country is putting much effort in developing a highly affordable tablet PC targeted for its educational purpose. Dubbed as Sakshat, it is estimated to be priced around $35 as the cheapest tablet PC in the industry.


During a recent press conference, Kapil Sibal, India Human Resource Development Minister has unveiled preview with its earlier prototype available for showcase. While the hardware specifications requirement is still pending finalization, but it is disclosed that the cost will include the main system such as processor, 2GB of RAM, WiFi, touchscreen, USB ports and all those necessary features with target thermal requirement of around 2W. In order to keep the cost down, the device will be preloaded with Android Operating System which is increasingly gaining its popularity in handheld and mobile segments.

By looking at its cost and thermal envelope, the processor is most probably based on ARM architecture and the new program is much cheaper as compared to previous OLPC (One Laptop Per Child) educational based XO-1 netbook targeted at $100. With its official release date in 2011, the government hopes to further reduce the price to $10-20 with subsidize and mass volume production by that time.

26 July, 2010

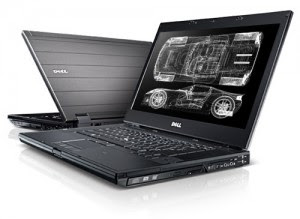
Dell Precission M4500: Core i7 Ready
Posted by Unknown | 26 July, 2010 | Category: | 0 comments

The Dell Precision M4500 is the latest 15-inch mobile workstation featuring powerful Intel processors up to the Intel Core i7 Extreme Edition and Nvidia Quadro FX 1800M discrete graphics for video editing, animation, and CAD manipulation.  The Precision M4500 boasts an optional 64GB SSD MiniCard for fast start up and your choice of up to a 256GB SSD or a 500GB HDD for file storage. Is this the most powerful workhorse on the market? Take a look and see if it’s time for an upgrade at your office.
As the latest laptop review unit of the Dell Precision M4500 features, here are the following specifications:
  • Windows 7 Ultimate (64-bit) with option for Windows XP Professional downgrade
  • Intel Core i7 620M @ 2.67GHz
  • 4GB DDR3 (1333MHz)
  • Nvidia Quadro FX 1800M graphics (1GB dedicated memory)
  • 15.6″ FHD LED Back-Lit Display (1920×1080 resolution, matte screen)
  • 64GB Solid State Drive MiniCard (operation system)
  • 500GB (7200RPM) HDD (storage)
  • Blu-ray disc drive (DVD recordable)
  • Intel Centrino Advanced-N 6200 802.11a/b/g/n Half Mini Card
  • 802.11 Wi-Fi Protected Access (WPA), 802.11i (WPA2), Virtual Private Networks (VPN) 802.1x with EAP modes and compatible with CCX 4.0
  • Dell Wireless 375 Bluetooth Module
  • Weight: 6.0 lbs (with 6-cell battery)
  • Integrated webcam and microphone
  • Dimensions: 14.72 x 1.15-1.42 x 9.96 inches (W x H x D)
  • 130 Watt AC adapter
  • 3-year basic limited warranty and 3-year next business day on-site service
Build and Design
The Dell Precision line of mobile workstation notebooks has long been a staple of corporate IT where users need the fastest multi-core processors and the most powerful discrete graphics for 3D animation, video editing, and CAD applications. Whether you’re a Hollywood animator working on next year’s blockbuster, or an engineer developing the next generation of communications satellites, you need extreme computing power with workstation-class certifications so you know it will work with the software you use every day.
The Dell Precision M4500 packs all that hardware into a durable shell with an old-fashioned industrial design. The magnesium alloy chassis is boxy and bulky yet very strong. The screen lid features a brushed aluminum appearance, while the interior has a simple black design. The massive palm rests show very little flex even under severe pressure and provide a comfortable platform for typing on the full-size, backlit keyboard.
One of the must-have features for business notebooks is extremely easy access to internal components. IT managers have to be able to open up a notebook to customize systems as needed for specific applications or make repairs. Dell designed the Precision M4500 with a single massive bottom panel that provides quick access to the RAM, hard drive, SSD MiniCard, and wireless cards inside the notebook. You’ll have to remove five screws in order to open the bottom of the notebook (that’s one more screw than similar HP mobile workstations) and that’s all that you need to do in order to start messing with the internal components.
Screen and Speakers
Dell offers the Precision M4500 with several different 15-inch screen options with 1366×768, 1600×900, and 1920×1080 resolutions. Our review unit came equipped with the 15.6″ FHD LED Back-Lit Display (1920×1080 resolution, matte screen). This 1080p high-definition display is perfectly usable both indoors and outdoors and features excellent color with rich contrast. The LED-backlit panel offers excellent brightness and we typically left the brightness set to between 50% and 70% when using the notebook indoors. The M4500 features an ambient light sensor to automatically adjust the screen brightness based on the available light, but we disabled this feature during our lab tests so that the screen brightness would remain constant.
Horizontal viewing angles are very good and you only start to notice some obvious color shift after you get more than 75 degrees off center. Vertical viewing angles are average as the screen begins to wash out from above and colors begin to invert from below after about 45 degrees in either direction.

Ports and Features
The M4500 features an impressive number of ports and external features crammed into a 15-inch notebook. You get both a PC Card and an Express Card slot for expansion and external peripherals, three dedicated USB 2.0 ports, one combo USB/eSATA port for connecting external hard drives, DisplayPort, FireWire, and even an additional Smartcard slot.


Battery
Dell offers the Precision M4500 with your choice of 6-cell or 9-cell Lithium-Ion batteries. The 6-cell battery is a 60Wh pack that sits flush with the back of the notebook. There are actually two different types of 9-cell batteries available for the M4500, a standard 90Wh version and a lower-capacity 81Wh version that features a special 3-year warranty against failure or dramatic loss of capacity. The lower capacity 9-cell battery also charges slightly slower than the 90Wh version in order to maintain battery life over a longer period of time. During our timed tests, with the laptop set to “balanced” mode, wireless active, and 70% screen brightness, the M4500 lasted for 5 hours and 37 minutes using the 9-cell, 90Wh battery. This is pretty impressive for a 15-inch (1920 x 1080 resolution) mobile workstation with a quad-core processor, and 1GB of discrete graphics.


Conclusion
After spending several weeks putting the Dell Precision M4500 through its paces, it’s clear that this is one of the most powerful mobile workstations we’ve tested. If you’re looking for a 15-inch workstation-class machine for your office then the M4500 is a very good candidate next to the Lenovo ThinkPad W510 and the HP EliteBook 8540w or 8440w notebooks.

Despite the impressive performance and awesome range of configuration options, the build quality of the Dell Precision M4500 is a little less than impressive in the areas of the keyboard and screen lid. The rest of this mobile workstation is quite solid, so these two weak points might be a relatively minor issue.
Bottom line, if you need a 15-inch mobile workstation with every configuration option imaginable, then the Dell Precision M4500 probably belongs on the top of a very short list. 
Pros:
  • Durable chassis
  • Powerful configuration options
  • Gorgeous screen
Cons:
  • Flexible keyboard
  • Flexible screen lid
  • Hot spot on keyboard

Firefox Mobile for Nokia N900 with add-ons

Posted by Unknown | | Category: , | 0 comments

Mozilla treated Nokia N900 and N810 owners this weekend by posting its first finished moblie web browser. Firefox Mobile 1.1 gives the Maemo-running phone the same browser engine as Firefox 3.6 on the desktop and now has features that have normally been off-limits. Add-ons give it extension beyond its original functionality; phone users can now save pages to PDF for viewing offline.

The browser already supports some elements of HTML5 and other modern browsing touches, although its design as a phone browser is still in progress. Viewers can double-tap to zoom into text, for example, but multi-touch is still promised for a later version despite the N900′s native support.
Mozilla is expected to port Firefox Mobile to other mobile platforms, including Android and Symbian, but has dropped plans for Windows Mobile in part because of the age of the old platform and the transition to Windows Phone 7.

Garmin eTrex Handheld GPS devices

Posted by Unknown | | Category: , , | 0 comments

Looking for a great handheld GPS for hunting or traveling? Now, Garmin eTrex Vista Hcx Gps has launched. Garmin eTrex Vista HCX handheld GPS is one of the top notch handheld GPS devices that you can carry on hunting trips. Of course, you can’t carry a GPS navigator in a separate pack on such trips, so the Garmin eTrex Vista HCX GPS easily fits into your pocket, and doesn’t give any annoying alerts that may warn your prey of your movements.
It is an extremely light-weight, compact GPS unit that has an intuitive menu, bright color screen, easy-to-use interface, and advanced navigation features. It is offered in a water-proof shell; so you don’t need to worry about water splashing on your GPS device in case you clip it onto your belt.
Advanced GPS Compass
The Garmin eTrex Vista HCX GPS also comes along with an advanced electronic compass that allows you to work in sync with your other hunting partners.
Another important aspect to be noted about the Garmin eTrex Vista HCX GPS unit is the sheer fact that its compass functions flawlessly even if you’re standing still, unlike some other GPS compasses that work well only if you’re on-the-move.
Loading Additional Maps
The eTrex Vista HCX GPS unit also supports MicroSD card slot allowing you to load topographic maps of your concern, and it can be of great help in marking your favorite hunting points on the map; so probably, you may want to mark those odd sweet spots that have been lucky enough for you in past.
Countless Waypoints
The Garmin eTrex Vista HCX is a WAAS enabled GPS unit, which has enormous capacity to store waypoints. It allows you to trace back the route accurately, and helping you in chasing your prey no matter how tough it may be, to bring it down!
The Bottom-Line
The Garmin eTrex Vista HCX gps unit provides all the necessary facilities, robust design, and seamless operation to the hunters, making it one of the top picks in the segment.
Its water-proof shell ensures high endurance, while its excellent battery back-up of up to 25hours ensures continuous operation throughout the day (and night!); this simply means that with Garmin eTrex Vista HCX gps on your side, you’ll never have to back-out from the kill, because of low battery, or poor signals.
As far as the pricing is concerned, the Garmin eTrex Vista HCX gps is available around the $300 mark in the market. But, you can find Garmin eTrex Vista HCX Handheld GPS on Amazon for just $216.54 with FREE shipping!

Increasing Shutdown Speed for XP\Win 7

Posted by Unknown | | Category: , | 0 comments

Windows XP stores a couple of values in its registry which are responsible for determining how long to wait before shutting down (killing) open applications and services once the shutdown command has been given.
By editing these two settings and changing them to lower values, you can considerably decrease the amount of time that Windows XP needs to successfully shut itself down. The first part of this tweak deals with setting the amount of time Windows will take to kill open applications on shutdown.
Open REGEDIT and navigate to 'HKEY_CURRENT_USER\ControlPanel\Desktop\'Highlight the 'WaitToKillAppTimeout' value. Set it to '1000' (the default should be 20000).Now highlight the 'HungAppTimeout' valueSet it to '1000' also.

The second part of this tip changes the same settings, this time for all users on the system.
Open REGEDIT and navigate to 'HKEY_USERS\.DEFAULT\ControlPanel\Desktop'Highlight the 'WaitToKillAppTimeout' value. Set it to '1000' (the default should be 20000).Now highlight the 'HungAppTimeout' value.Set it to '1000' also.

In the third part of this tip, we will alter a second registry setting to decrease the amount of time Windows XP will wait before shutting down active services after receiving a shut down command.
Open REGEDIT and navigate to 'HKEY_LOCAL_MACHINE\System\CurrentControlSet\Control\'
Highlight the value 'WaitToKillServiceTimeout' Change this value to '1000.'
This should help to considerably speed up the time windows XP takes to shut itself down.

25 July, 2010

Stop and Disable Windows Update Auto Restart or Reboot

Posted by Unknown | 25 July, 2010 | Category: , | 0 comments

In Windows 7, Windows Vista and Windows XP, after installing downloaded updates via Windows Update manually or scheduled Automatic Updates automatically, the system will auto-restart or auto-reboot in order to apply all the updates. Despite Windows 7 has added option to allow users to postpone or delay the restart, the computer will still automatically restart sometime later, if the updates required system to be rebooted to finish the installation.

Microsoft started to implement the feature where some system-related updates will only be installed and applied on system restart since Windows XP SP2 (Service Pack 2). Once system completes the installing of updates which requires to restart Windows, system will notify users that it needs to restart, and if there is no response from user in 5 minutes, Windows will automatically reboot the computer, even though user is logged on, and has programs running or documents opened.
The immediate result of Windows automatic restart is that any unsaved data, such as files, documents, spreadsheets, presentations, databases, and servers will be lost, and downloads or processes such as backup or defragmentation that not yet finished will be terminated, directly or potentially causing data lost.
To prevent, avoid and stop Windows from automatically restart, use the trick below to disable the auto restart after installing Windows Updates feature.
  1. Click on Start button, and type gpedit.msc into Start Search or Run command, and hit Enter.
  2. In Local Group Policy Editor, navigate to Computer Configuration -> Administrative Templates -> Windows Components -> Windows Update.
  3. Double click on No auto-restart with logged on users for scheduled automatic updates installations.
  4. Select Enabled radio button and click OK.

  5. Close Local Group Policy Editor.
For user of Windows 7, Vista and XP Home edition which does not have a Group Policy Editor, the setting can be added directly in registry with the following registry key and value.
  1. Run Registry Editor (RegEdit).
  2. Navigate to the following registry key: HKEY_LOCAL_MACHINE\Software\Policies\Microsoft\Windows\WindowsUpdate\AU
    Note: If the key does not exist, create new key and name accordingly.
  3. Change the NoAutoRebootWithLoggedOnUsers DWORD (32-bit) Value to 1 to disallow auto-reboot. By default, the value is 0 which allow auto-reboot.

    Note: If the value does not exist, create a new DWORD (32-bit) Value and name accordingly.
  4. Close Registry Editor.
Once the policy is enabled, Automatic Updates will wait for the computer to be restarted by any user who is logged on, instead of causing the computer to restart automatically to complete a scheduled installation. Instead, Windows will not notify users that a restart is required to complete the installation.

Download Skype 2.0.1 For iPhone, iPod Touch Or iPad

Posted by Unknown | | Category: , | 0 comments

Skype iPhone app is a version of Skype for iPhone, iPod touch or iPad which allow users to make and receive calls, and instant message anyone else on Skype. In an effort to make it more user friendly, Skype has recently make improvements to its iPhone app which allow users to make calls through the 3G connections with high quality sound and supports multitasking. With this upgraded the users able to receive calls and instant messaging while running other applications.


New features of the Skype 2.0.1 for iPhone includes:
  • Run Skype in the background with multitasking in iOS4.
  • Receive Skype calls and IM while other apps are running or when the iPhone is locked. The users also can continue their call while switch to another application.
  • Multitasking is available only with iPhone 4 and iPhone 3GS.
The new version of Skype for iPhone works well on iPhone, iPhone 3G, iPhone 3GS, iPhone 4, iPad and iPod touch with iPhone OS version 3.0 and above. It is available as a free download from Apple App Store.

Sharp FX Quick Messaging Phone with QWERTY Keyboard (AT&T)

Posted by Unknown | | Category: , | 0 comments

AT&T has announced the upcoming launch of new Sharp FX, which the corporation claims as the first Sharp-branded quick messaging phone in AT&T portfolio, featuring AT&T Mobile TV support, 3.0″ full touchscreen display, Bluetooth 2.1, and slide-out full QWERTY keyboard for quicker typing experience, seems perfect for teenagers who put text messaging as the central hub of communication.


Main Features Of Sharp FX (AT&T) include:
  • 3.0-inch WQVGA (400 x 240 pixel) touch screen
  • Full QWERTY keyboard and 2 megapixel camera
  • AT&T Mobile TV for access to full-length live and time-shifted TV programs from FLO TV ($9.99 a month)
  • AT&T Address Book for syncing contacts to an online address book
  • att.net mobile browser with full HTML surfing support
  • AT&T Navigator with turn-by-turn directions
  • AT&T Social Net enables users access multiple social networking sites from 1 app
  • Online Locker to store precious photos and videos that captured by cellphone
  • Talk time: up to 3 hours ; Standby time: up to 10 days
Sharp FX quick messaging phone which measures 114 x 56 x 15 mm and weighs in at 142 grams is scheduled to hit AT&T stores for $99.99 beginning July 25, after a $50 mail-in rebate with two-year service contract.

hit counters